
Building a Simple Blog in One File with React
Scoping Out The Project
Here's a basic business need: you want to make a blog and you'd rather not pay a monthly fee, or anything at all. At the same time, you want it to be as extensible and open-ended as possible.
Eventually you'll make it better but it should be presentable, as is. It should look good enough to act as your Internet business card.
The design doesn't need to be at the A+ pro level. If it looks crisp and modern, and you or someone you know can adjust the design, that's enough.
Here's how to do that, with all the code you write contained in only one short file, using React.
Don't Overcomplicate It
My process here will be to do the minimum for each step, adding a feature per step.
I'm avoiding some topics to keep the complexity level down. There isn't any routing, because there's enough to explain in this post - but I used this blog post to write another blog post that shows you how to do routing if you want more.
If you want to use this for a blog, you absolutely can; just clone it, look at how the blog posts and routes are implemented, and edit anything you want.
Making A Basic React App
Create-React-App
First we're going to do create-react-app, to create our app's directory structure.
While you can google how to install create-react-app (which comes with npm), it's basically as simple as running this command:
npx create-react-app blog Then we're going to edit the default App.js page to have a title and show some text.
So after you enter your blog directory, you can delete App.js. We don't need anything in there.
The topic of this blog will be famous tech companies. Each blog post will have a description of a famous company.
Let's do the big four: Amazon, Google, Apple, FaceBook.
Scott Galloway wrote a book about the big 4 tech companies called The Four.
To keep it as simple as possible, I'm going to make each company its own component. I'm also going to put it all in one file.
There's just five components: one for each company, and one to space them. They are Google, Amazon, Facebook, Apple, and Spacer.
This last one, Spacer, is known as a styled component. This means I need the dependency styled-components.
You can think of styled-components as that piece that gives you a nice way to mix CSS with your components.
You'll want to run the command npm i styled-components or yarn add styled-components from your project directory before going any further.
Here's the code, with one tech company component shown.
The rest are basically identical, with only the text changing. Instead of "Google", it's "FaceBook," and instead of having p content like '<p>This is Google</p>', it says '<p>This is FaceBook</p>'.
Repeat for every other company component.
import React from 'react';
import styled from 'styled-components';
const Spacer=styled.div`
padding-left: 2vw;
`
const Google = () =>(
<p>This is Google. It's a search engine started by Sergey Brin and Larry Page.</p>
<p>PageRank is the search algorithm that started it all. Today it's a 100 trillion dollar company.</p>
)
//then a bunch of other components like the Google one, just with different text...
function App(){
return (
<Spacer>
<Google/>
<Amazon/>
<FaceBook/>
<Apple/>
</Spacer>
);
}
export default App;
Right now we have the bare minimum. So let's add a little more.
Making A Single Column with CSS
Let's format our text into a single column.
I'm going to do the CSS directly, instead of using a library that does the formatting for you. If you can do it in a few lines of CSS instead of JavaScript, you should.
Basically I used styled components again, and borrowed the CSS from this excellent guide to get the single text column look.
https://themefoundation.com/single-column-css-layout
const Wrap=styled.div`
max-width: 1200px;
margin: 0 auto;
padding: 1em;
`
const Primary=styled.div`
max-width: 650px;
margin: 0 auto;
font-family: 'Sen', sans-serif;
`
In short, it sets up a fixed width column in the middle of the page.
I use it like this:
<div>
<Wrap>
<Primary>
<MyComponent a.k.a. CompanyName here/>
</Primary>
</Wrap>
</div>
Adding A Hover Effect
I thought a hover effect would add some pizzazz, using the CSS shown in this article.
const Block = styled.div`
cursor: pointer;
background: transparent;
font-size: 16px;
border-radius: 3px;
border: 2px solid darkgray;
margin: 0 1em;
padding: 0.25em 1em;
margin-bottom: 3vh;
margin-top: 1vh;
transition: 0.5s all ease-out;
&:hover {
background-color: darkgray;
color: white;
}
`;
It's used like this:
<Block>
<CompanyName>
</Block>
Now, when you hover over a company name, it lights up.
You can see it in action below.
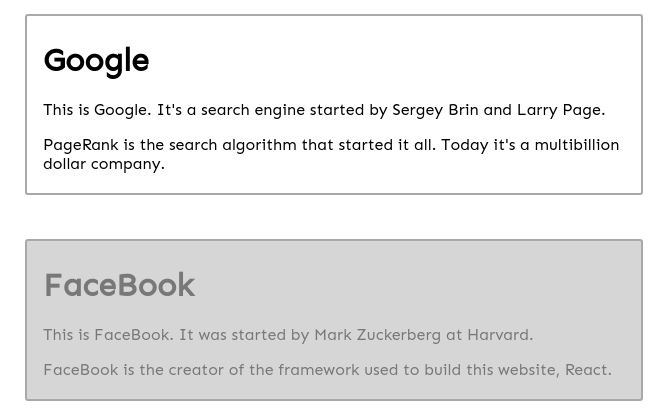
On the website itself, there's a better-looking animation.
https://blog-basic.s3.amazonaws.com/index.html
How to Add New Blog Posts
In this example, each company is a stand-in for a blog post.
While my components are super short, two lines each, yours can be long, and include images, multiple styled divs, even a form or something using state (not covered in this article).
You can just keep adding them to App.js to keep this to a single file, or you can copy the components shown as company names into their own files before importing them.
Live Demo
You can see the website in action at the link below.
https://blog-basic.s3.amazonaws.com/index.htmlIncidentally, that blog is really being hosted on AWS, on S3, which means the hosting cost is as low as it can possibly be: less than a dollar a month, probably much less.
Because it's a static site, it will also basically never, ever crash.
If you can host your website as a static site, the price and uptime will be unbeatable. It's a nice option when you can use it, but configuring it to work with https is a pain (note: it doesn't now).
You can copy the code from GitHub here:
https://github.com/julianeon/blog-basic-react
Conclusion
This tutorial hopefully shows you just enough to get started with React, without being overwhelming.
It's not a very fancy website, but if you have a straightforward need, it may be enough. Since you wrote the code, you can expand it as you learn and improve. It's easy to build up from a simple core that's solid.
Good luck, and thanks for reading!