
Building a Basic Business Site Using React
Here's a basic business site layout, the minimum you might want to offer.
It's basically an amped-up blog design, with an about form.
To start, it should have a main page for blog posts, pages individual posts, something like an About or Contact form, and the ability to add in more routes, pages, and functionality over time.
The site should look good, but the design doesn't need to be impeccable.
Here's how, using React.
If you want to download and run with this code, you are free to under the MIT license.
Read on for the full guide!
Creating The Most Basic App
Beginnings
This is covered in an earlier article, but basically, do create-react-app for the directory structure, then add components to beef it up.
This blog's going to be about famous tech companies. Each blog post will have a description of a famous company: Amazon, Google, Apple, FaceBook.
There's just five components: one for each company, and one more to space them so they're not quite flush with the left side of the page.
Here's the code, with only one tech company component shown, as the rest are basically identical, sans text.
Code
import React from 'react';
import styled from 'styled-components';
const Spacer=styled.div`
padding-left: 2vw;
`
const Google = () => (
<>
<h1>Google</h1>
<p>This is Google. It's a search engine started by Sergey Brin and Larry Page.</p>
<p>PageRank is the search algorithm that started it all, and ultimately gave rise to a 100 trillion dollar company.</p>
</>
)
...
function App() {
return (
<Spacer>
<Amazon/>
<Google/>
<FaceBook/>
<Apple/>
</Spacer>
);
}
export default App;
Getting 1 Column + NavBar using a Library
Next, we want to get the slick single column look and a navigation bar, so our blog doesn't look quite so basic.
You could do all this yourself, with your own CSS and HTML - but if you look at the amount of design difference we're getting from the library, it's a lot. It's worth the relatively small time investment to learn and include this in our blog; building this much on our own would take longer.
Using a Design Library
I could've used several libraries for this: for example, Google's Semantic UI, or React Bootstrap.
I decided to go with Antd, because I've been wanting to learn it and it meets the 'looks good' requirement. It's a perfectly respectable choice, if you decide to follow this guide and use it too.
Generally, for all these libraries, you run 'npm install' or 'yarn add' to get the library, and then include or import a CSS file somewhere; basically, 2 commands.
For antd, I ran:
yarn add antd Then I included this line at the top of my App.js file:
import 'antd/dist/antd.css'; I then added the Header-Content-Footer structure, described as the 'most basic' on their website. As a basic kinda guy, this suited me.
https://ant.design/components/layoutHere's what it looks like on their webpage.
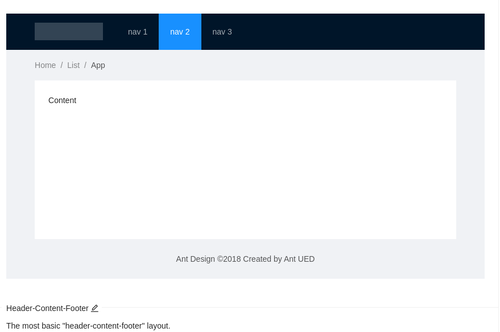
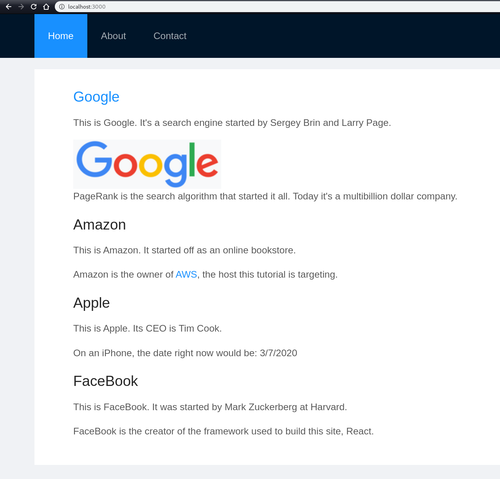
Here's what it looks like when implemented on my site, many edits later:
Changes
Let's survey the blog's various pages, all in one folder for simplicity's sake.
First we have App.js. It's basically the spot for React Router: that is, all the pages you can visit on this site.
Inside it, there is one piece of UI: Layer, found in Layer.js. That has the antd UI pieces that repeat on every page: the navbar, and the context text box.
Both have pretty much the names you'd expect in the Layer.js file's functions.
Layout
There is one piece of unavoidable complexity inside there: ({children}).
Basically if you have a component, say a couple of lines of text, in pseudocode:
Component 1 =
<div>This is a children's bike. It's on sale for 100 dollars.</div>
Component 2 =
<div>This is a child's push stroller. It can be yours for 50 dollars.</div>
And you want to have this kind of structure:
Layout = NavBar, content that will change, Footer
Meaning, in some cases, you want this:
<Layout>
<Navbar>
<Component 1>
<Footer>
</Layout>
And in other cases, you want this:
<Layout>
<Navbar>
<Component 2>
<Footer>
</Layout>
You can enable this by using the Layout structure shown in Layer.js.
It looks like this (conventionally, people always give the 'inherited' part the name children):
const Layout = ({children}) => (
<NavBar>
{children}
<Footer>
)
Then, when you actually use it, you do it like this:
<Layout>
<Component 1> or <Component 2> or both plus anything else you want to go in between
</Layout>
As shown, it works.
How to Use the Code
You can copy the files shown in the project already and adapt them, the ones with company names.
Google shows an example of using an image in a file (the Google logo).
Amazon shows a link in action.
Apple shows an example of defining a variable outside of render - in this case, the date.
FaceBook is plain vanilla, showing just a component in action.
And that's how you can create a business site in 1 page, using React.